Unlock Your Inner Artist: Easy Flower Drawing For Everyone
Ever dreamt of creating beautiful art but felt intimidated? The idea of drawing intricate flowers might sound like a daunting task reserved for seasoned artists, but what if we told you that mastering easy flower drawing is not only achievable but also incredibly fun and relaxing? It sounds (and looks!) fancy but is surprisingly easy to make beautiful art, transforming a blank page into a vibrant bloom with just a few simple strokes.
This comprehensive guide is designed to demystify the process, breaking down complex floral forms into simple, manageable steps. We'll explore techniques that make drawing flowers surprisingly easy, turning perceived challenges into delightful creative moments. Forget the notion that you need innate talent; with the right approach and a little practice, anyone can enjoy the therapeutic benefits and satisfaction of creating their own stunning floral art. Just like discovering a collection of 45 easy pantry recipes that make weeknight cooking a breeze, you're about to unlock a creative skill that makes artistic expression a joyful, effortless part of your daily life.
Table of Contents
- The Joy of Simple Floral Art
- Why Easy Flower Drawing is Your Perfect Starting Point
- Essential Tools for Your Floral Journey
- Breaking Down Complexity: The Core of Easy Flower Drawing
- Step-by-Step Guides to Classic Easy Flowers
- Adding Life: Shading and Color for Your Easy Flower Drawings
- Overcoming Common Hurdles in Easy Flower Drawing
- The Therapeutic Benefits of Easy Flower Drawing
- Your Next Steps in Floral Artistry
The Joy of Simple Floral Art
There's a unique satisfaction that comes from creating something beautiful with your own hands. For many, the world of art can seem exclusive, a realm only for those with natural talent or years of formal training. However, the truth is that art, especially something as approachable as easy flower drawing, is for everyone. It's about expression, relaxation, and the simple pleasure of bringing a vision to life on paper. Imagine being able to sketch a charming daisy during your lunch break or a delicate rose while sipping your morning coffee. This isn't just a pipe dream; it's an accessible reality.
The beauty of focusing on easy flower drawing lies in its immediate gratification. You don't need to spend hours mastering perspective or anatomy. Instead, you can quickly learn a few foundational techniques and almost immediately see pleasing results. This quick success builds confidence and encourages further exploration, transforming what might have seemed like a daunting hobby into a delightful escape. It’s like discovering a collection of 22 easy steak dinners you can make any night of the week; once you realize how simple it can be, you'll wonder why you didn't start sooner. The simple act of putting pencil to paper and watching a flower emerge is a powerful antidote to daily stress, offering a moment of calm and focused creativity.
Why Easy Flower Drawing is Your Perfect Starting Point
For aspiring artists, choosing the right starting point is crucial. Diving into complex subjects too soon can lead to frustration and discouragement. This is where easy flower drawing shines. Flowers, in their diverse forms, offer an incredible range of shapes and structures that can be simplified into basic geometric forms. This simplification is the cornerstone of learning to draw effectively. By breaking down a complex subject into its fundamental components, you train your eye to see shapes, not just objects, a skill invaluable for any artistic endeavor.
Moreover, flowers are forgiving. A slightly imperfect petal or a wobbly stem often adds to their natural charm, rather than detracting from it. This low-pressure environment allows you to experiment freely, make mistakes, and learn without the fear of "ruining" your artwork. It’s an ideal way to build muscle memory, understand basic shading, and develop your unique artistic style. Just as planning a picnic or cookout makes it easy to include all the classics like burgers, hot dogs, and potato salad, focusing on easy flower drawing makes it simple to incorporate fundamental art skills into your creative repertoire, setting a solid foundation for future artistic growth.
Essential Tools for Your Floral Journey
One of the most appealing aspects of easy flower drawing is how little you need to get started. You don't require an expensive art studio or a vast array of specialized materials. The beauty lies in simplicity. Here's a quick rundown of the absolute essentials:
- Pencils: A basic set of drawing pencils (HB, 2B, 4B) will suffice. HB is good for light sketches, while 2B and 4B are excellent for darker lines and shading.
- Paper: Any standard drawing paper or even plain printer paper is perfect for practice. As you progress, you might explore slightly thicker sketch paper.
- Eraser: A kneaded eraser is fantastic for lifting graphite without smudging, and a vinyl eraser is great for crisp clean-ups.
- Sharpener: Keep your pencils sharp for precise lines.
That's it! With these basic items, you're ready to embark on your floral art journey. Just as you'd prepare your kitchen by positioning racks in the center of the oven and lining baking sheets with parchment before whisking together flour, baking soda, and salt in a large bowl, you'll prepare your drawing space. Gather your simple tools, find a comfortable spot, and get ready to create. The emphasis here is on accessibility and ease, ensuring that nothing stands between you and your desire to draw beautiful flowers.
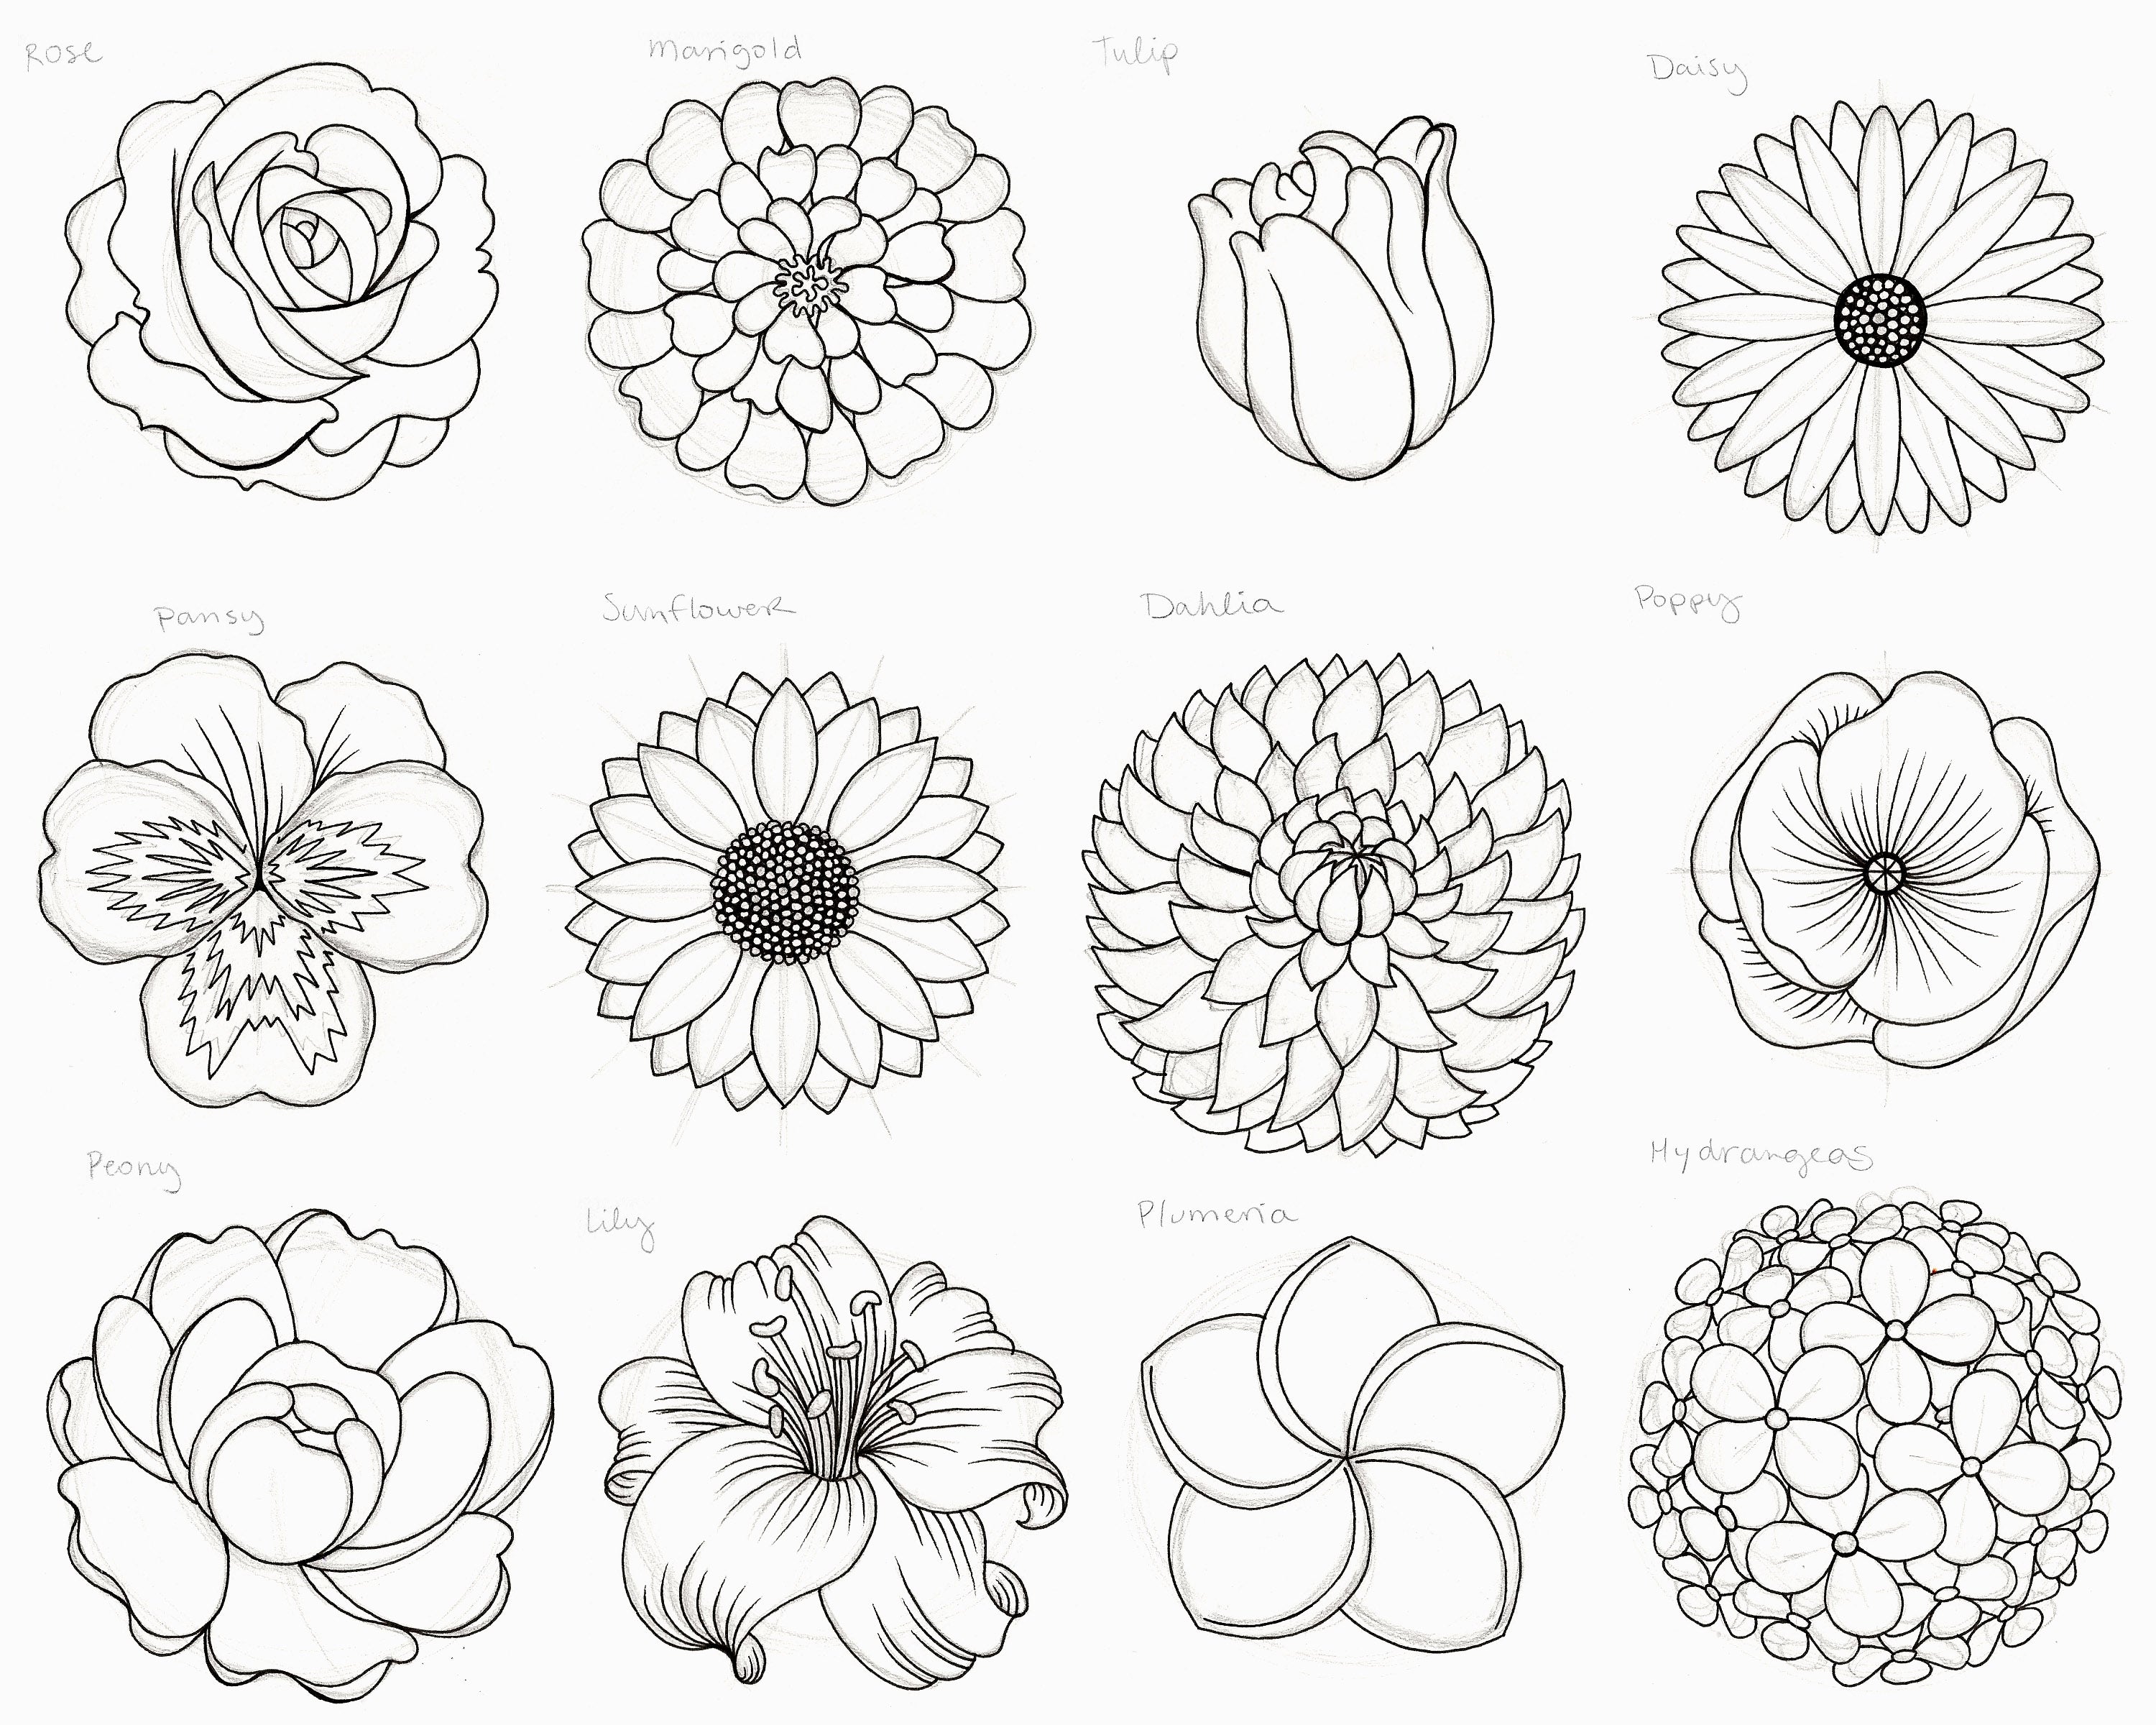
Breaking Down Complexity: The Core of Easy Flower Drawing
The secret to drawing anything that looks complex, especially flowers, is to simplify it. Every intricate petal, every delicate stem, can be broken down into basic shapes. This method is the backbone of all easy flower drawing techniques. Instead of seeing a finished rose, you learn to see circles, ovals, and curves. This analytical approach demystifies the process and makes it manageable for anyone, regardless of their prior experience. It's akin to how the Food Network Kitchen team develops and tests recipes, breaking down complex dishes into manageable steps and ingredients to ensure everyone can achieve delicious results.
Starting with Basic Shapes
Every flower begins with a foundational structure. Think of this as the skeleton of your drawing. Most flowers can start with a simple circle or oval for the center, and then lines or larger ovals for the general shape of the petals. For instance, a daisy might begin with a small circle for its center and a larger circle encompassing where its petals will extend. A tulip might start with two overlapping ovals. This initial step is about getting the general proportion and placement right, without worrying about perfection. In a small bowl, you might whisk together the coconut cream, lime juice, and orange juice to start a recipe; similarly, you'll "whisk together" these basic geometric shapes on your paper to begin your floral masterpiece.
Layering and Adding Petals
Once your basic shapes are in place, you begin to add the petals. This is where the flower starts to take form. Instead of drawing each petal perfectly, think in layers. Start with the petals closest to the center, then add the ones behind them, allowing them to overlap naturally. This creates depth and dimension. Don't be afraid to let petals vary slightly in size and shape; nature isn't perfectly uniform! This process is much like adding apples and tossing them in a bowl to coat them – you're building up layers and textures to create a cohesive whole. Remember, the goal is not photographic realism but a pleasing representation that captures the essence of the flower.
Refining Your Lines and Adding Detail
After you've sketched out the main shapes and layers of petals, it's time to refine your drawing. This involves going over your initial light sketch lines with a firmer hand, making your final lines darker and more confident. You can then use your eraser to gently remove any unwanted guide lines or stray marks. This step is crucial for giving your drawing a clean, polished look. Think of it like removing the apples with a slotted spoon to a bowl, leaving behind only the perfectly coated fruit – you're carefully extracting the essential lines and leaving the rest behind. At this stage, you can also add small details like veins on petals, subtle texture in the center, or a few leaves on the stem to bring your easy flower drawing truly to life. Scroll for more photos and examples of how simple refinement can elevate your sketches!
Step-by-Step Guides to Classic Easy Flowers
Now that you understand the foundational principles, let's put them into practice with some classic flowers that are surprisingly easy to draw. With these easy flower drawing techniques, it's simple to include all the classics in your sketchbook, just as you'd effortlessly include burgers, hot dogs, and festive cocktails in your Fourth of July recipes. These examples are perfect for beginners and will quickly build your confidence.
The Simple Daisy
The daisy is perhaps the quintessential easy flower drawing. Its symmetrical structure and distinct petals make it a perfect starting point.
- Step 1: Draw a small circle for the center of the daisy.
- Step 2: Around this circle, draw a slightly larger circle as a guide for the length of your petals.
- Step 3: Start drawing petals radiating outwards from the inner circle, extending to the outer guide circle. Make them slightly rounded at the tips. Don't worry about making them perfectly uniform; natural variations add charm.
- Step 4: Once all petals are drawn, add a few small dots or a subtle spiral in the center for texture.
- Step 5: Draw a simple stem and a couple of leaves. Erase your guide circles, and your daisy is complete!
This simple approach makes creating a beautiful daisy a breeze, a technique you can master in minutes.
The Elegant Rose (Simplified)
Roses often intimidate aspiring artists, but with a simplified approach, they become incredibly accessible. This easy flower drawing method focuses on the spiral nature of the rose.
- Step 1: Start with a small, loose spiral in the center of where you want your rose to be. This will be the innermost petals.
- Step 2: Around this spiral, draw a series of "C" shapes or curved lines, overlapping them to suggest petals unfurling. Think of them as cupping the central spiral.
- Step 3: Continue adding more "C" shapes or curved lines outwards, making them progressively larger. Vary their direction slightly to create a natural, organic look.
- Step 4: Once you have a good number of petals, draw a stem and some thorny leaves (optional).
- Step 5: Refine your lines, making some darker and others lighter to suggest depth. This simplified rose looks incredibly elegant without being overly complicated.
This method proves that even complex flowers can be distilled into easy-to-follow steps.
The Whimsical Tulip
Tulips are known for their elegant, cup-like shape, which translates beautifully into an easy flower drawing.
- Step 1: Draw a large oval for the main body of the tulip.
- Step 2: Inside this oval, draw a "V" shape at the top, forming the opening of the tulip's petals.
- Step 3: Add two curved lines extending upwards from the top sides of the oval, meeting at a point to form the top outer petal.
- Step 4: Draw a long, slightly curved stem extending downwards from the bottom of the oval.
- Step 5: Add one or two broad, slightly curved leaves emerging from the stem. Tulips have distinct, simple leaves.
- Step 6: Refine your lines, erasing any initial guide marks. The result is a charming, whimsical tulip that’s surprisingly easy to achieve.
Get the drawing steps and more examples after this section. These 125 weeknight dinners that make it easy to put food on the table are much like these drawing guides – designed for quick, satisfying results.
Adding Life: Shading and Color for Your Easy Flower Drawings
Once you've mastered the basic outlines of your easy flower drawing, you might want to add another layer of depth and vibrance: shading and color. You don't need to be a master of light and shadow or a color theorist to make your drawings pop. Simple techniques can make a huge difference.
- Basic Shading: Identify a light source (imagine where the sun is hitting your flower). The areas facing away from the light will be darker. Use your pencil to apply lighter pressure for highlights and heavier pressure for shadows. You can also use cross-hatching (parallel lines in different directions) or blending (rubbing with a finger or blending stump) to create smooth transitions. Even subtle shading can give your flower a three-dimensional quality.
- Simple Color: For beginners, crayons, colored pencils, or even basic watercolors are perfect. Don't worry about complex palettes. Choose a few colors that resonate with the flower you're drawing. Apply color evenly, or try layering different shades of the same color to create depth. For example, use a lighter green for the top of a leaf and a darker green for the underside.
Adding these elements transforms your line drawing into a more complete piece of art. It’s like adding festive cocktails to your picnic spread – it just elevates the whole experience. Remember, the goal is to have fun and experiment, not to achieve perfection. Each stroke, each shade, adds to your unique artistic voice.
Overcoming Common Hurdles in Easy Flower Drawing
Even with "easy" techniques, it's natural to encounter a few bumps along the creative road. The most common hurdles include perfectionism, comparing your work to others, and feeling a lack of inspiration. However, these are easily overcome with a shift in mindset and a few practical tips.
- Embrace Imperfection: Nature itself is imperfectly perfect. A slightly asymmetrical petal or a unique curve adds character to your flower. Let go of the need for flawless lines and embrace the organic beauty of your hand-drawn art. This frees you to experiment and enjoy the process.
- Focus on Your Journey: It's easy to scroll through social media and see stunning artwork, feeling discouraged by your own beginner sketches. Remember that every artist, even Matt Armendariz or any celebrated creator, started somewhere. Your journey is unique, and progress, not perfection, is the goal. Celebrate small victories and focus on your personal growth.
- Find Inspiration Everywhere: If you're feeling uninspired, look around you. A walk in a garden, a bouquet of flowers, or even images online can spark new ideas. Try drawing the same flower from different angles or in different styles. Just as there are 10 creative ways to use leftover corned beef, there are endless ways to approach drawing a single flower.
Updated on April 11, 2025, these principles remain timeless. Just like the Food Network Kitchen team develops and tests recipes to ensure they work for home cooks, these drawing tips have been tested and refined by countless budding artists to help you succeed and enjoy your creative process.
The Therapeutic Benefits of Easy Flower Drawing
Beyond the joy of creating beautiful art, easy flower drawing offers profound therapeutic benefits. In our fast-paced world, finding moments of calm and mindfulness is crucial for mental well-being. Drawing provides just that. The act of focusing on lines, shapes, and colors can be incredibly meditative, helping to quiet a busy mind and reduce stress.
- Stress Reduction: Engaging in a creative activity like drawing shifts your focus from daily worries to the present moment. It's a form of active meditation that can lower cortisol levels and promote relaxation.
- Mindfulness: Drawing requires you to pay close attention to detail, observing the nuances of a flower's form. This heightened awareness brings you into a state of mindfulness, enhancing your appreciation for the natural world.
- Emotional Expression: Art provides an outlet for emotions, allowing you to express feelings that might be difficult to put into words.
- Boosted Mood and Confidence: Completing a drawing, no matter how simple, provides a sense of accomplishment and boosts self-esteem.
Just as 16 healthy brown rice recipes are packed with nutritional benefits, engaging in easy flower drawing is packed with mental and emotional advantages. It's a simple, accessible way to nurture your mind, body, and spirit, making it far more than just a hobby—it's a pathway to greater well-being. It’s one of the 10 things to do with leftover creative energy that truly pays dividends for your mental health.
Your Next Steps in Floral Artistry
You've taken the first crucial step by learning about the principles and techniques of easy flower drawing. Now, the real fun begins: practice! The more you draw, the more comfortable and confident you'll become. Don't aim for perfection in every sketch; instead, aim for consistency and enjoyment.
- Practice Regularly: Even 10-15 minutes a day can make a significant difference. Keep a sketchbook handy and draw whenever inspiration strikes.
- Explore Different Flowers: Apply the basic shape method to other flowers you encounter. Look at photos, observe real flowers, and challenge yourself to simplify their forms.
- Experiment with Mediums: Once comfortable with pencils, try adding color with colored pencils, markers, or even watercolors.
- Share Your Work: Don't be afraid to share your easy flower drawings with friends, family, or online communities. Receiving feedback and encouragement can be incredibly motivating.
Remember, art is a journey, not a destination. There's always something new to learn, a new technique to try, or a new flower to draw. This guide, updated on April 11, 2025, provides a solid foundation, but your unique artistic path is yours to explore. We encourage you to pick up your pencil today and start transforming blank pages into beautiful blooms. What's the first easy flower drawing you're excited to try? Share your thoughts and creations in the comments below, and let's inspire each other to keep blossoming!
How To Draw A Flower Step By Step For Beginners
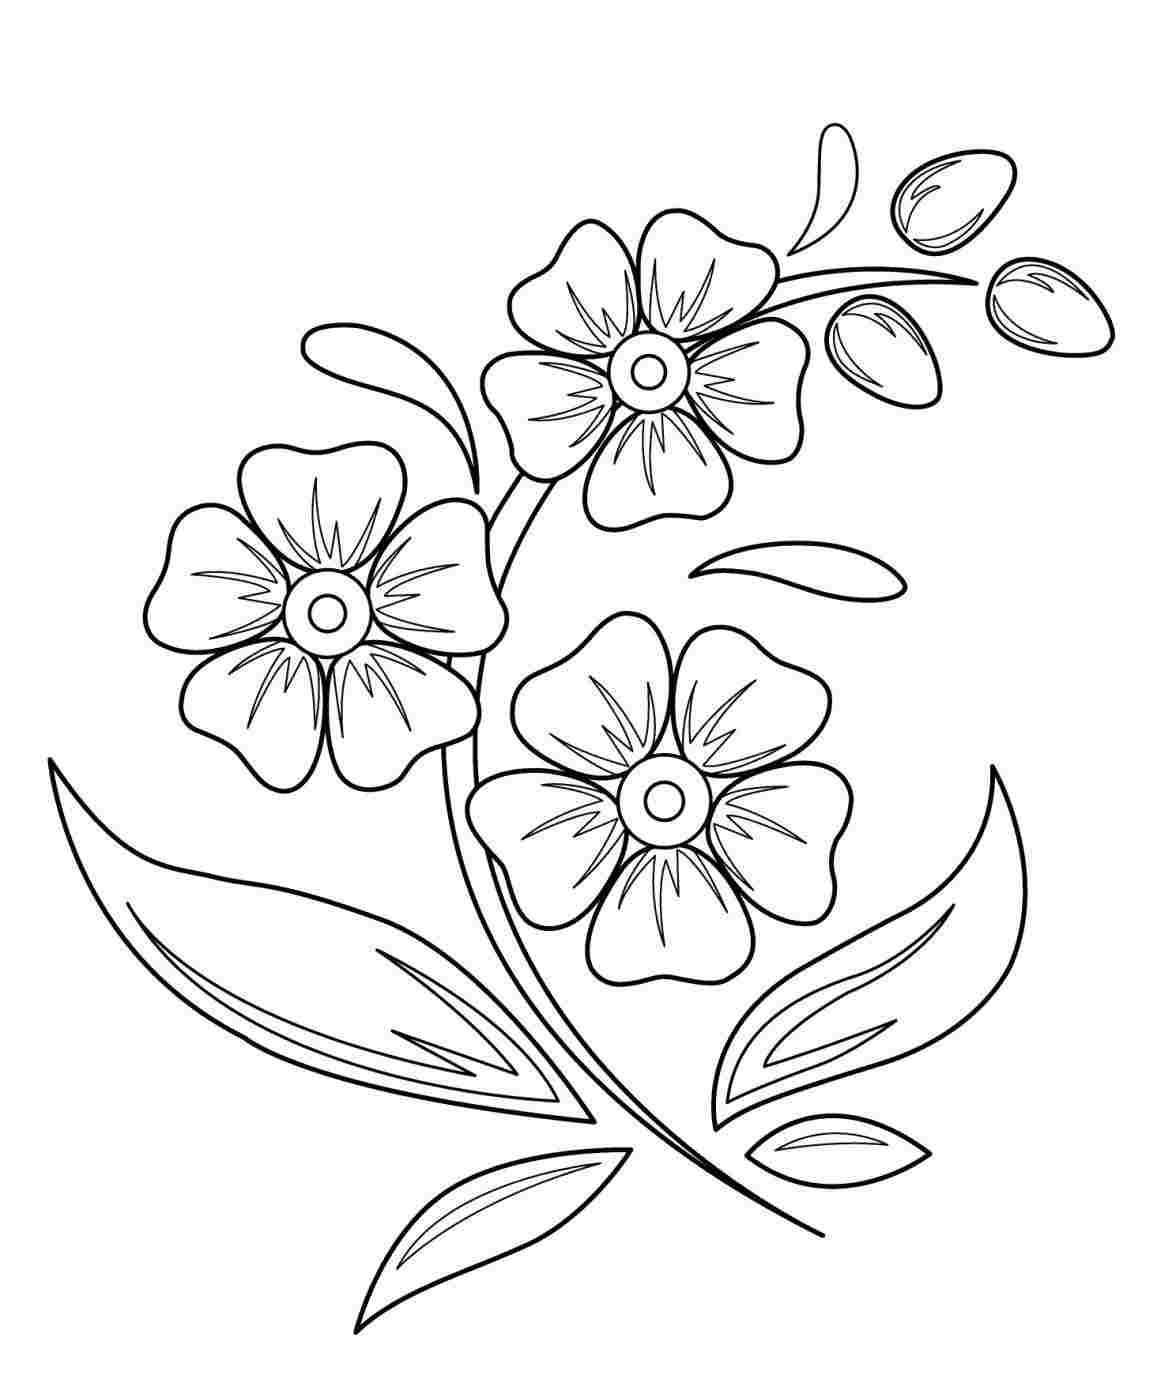
Easy Flower Drawing For Kids at PaintingValley.com | Explore collection

How to Make a Flower Drawing {5 Easy Steps}! - The Graphics Fairy
