Master The Art Of Soccer Ball Drawing: A Complete Guide For All Skill Levels
Embarking on the journey of soccer ball drawing can be a surprisingly rewarding experience, transforming a simple circle into a dynamic, three-dimensional object. While it might seem straightforward at first glance, many aspiring artists quickly discover that mastering the intricate pattern of a traditional soccer ball presents a unique challenge. This guide is meticulously crafted to demystify the process, offering you the easiest way to draw a soccer ball, regardless of your current artistic skill level.
From sketching the initial outline of the ball to filling in the intricate details and adding realistic shading, this comprehensive tutorial will help anyone achieve stunning results. We understand that how to draw a soccer ball seems easy until you actually try to draw the pattern—that’s where it can get tricky. But fear not! Our step-by-step approach breaks down the complexity, making it incredibly simple to create a realistic soccer ball illustration effortlessly. Get ready to discover how easy it is to learn how to draw a soccer ball with this fun and detailed tutorial.
Table of Contents
- The Anatomy of a Soccer Ball: Understanding Its Unique Structure
- Essential Tools for Your Soccer Ball Drawing Journey
- Preparing Your Canvas: Setting the Stage for Success
- Step-by-Step Guide to Soccer Ball Drawing: The Easiest Way
- Common Pitfalls and How to Avoid Them in Soccer Ball Drawing
- Beyond the Basics: Advanced Tips for Lifelike Soccer Ball Drawings
- The Curious Case of the Word "Soccer": A Brief History
- Elevate Your Art: Practice and Persistence in Soccer Ball Drawing
The Anatomy of a Soccer Ball: Understanding Its Unique Structure
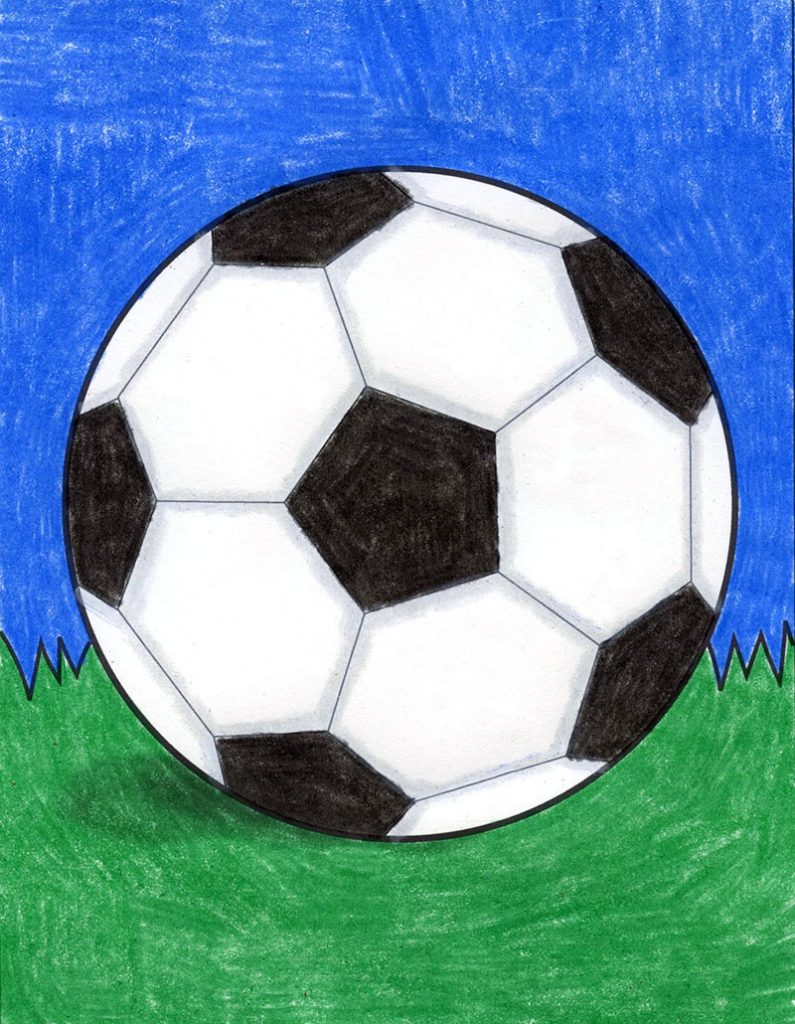
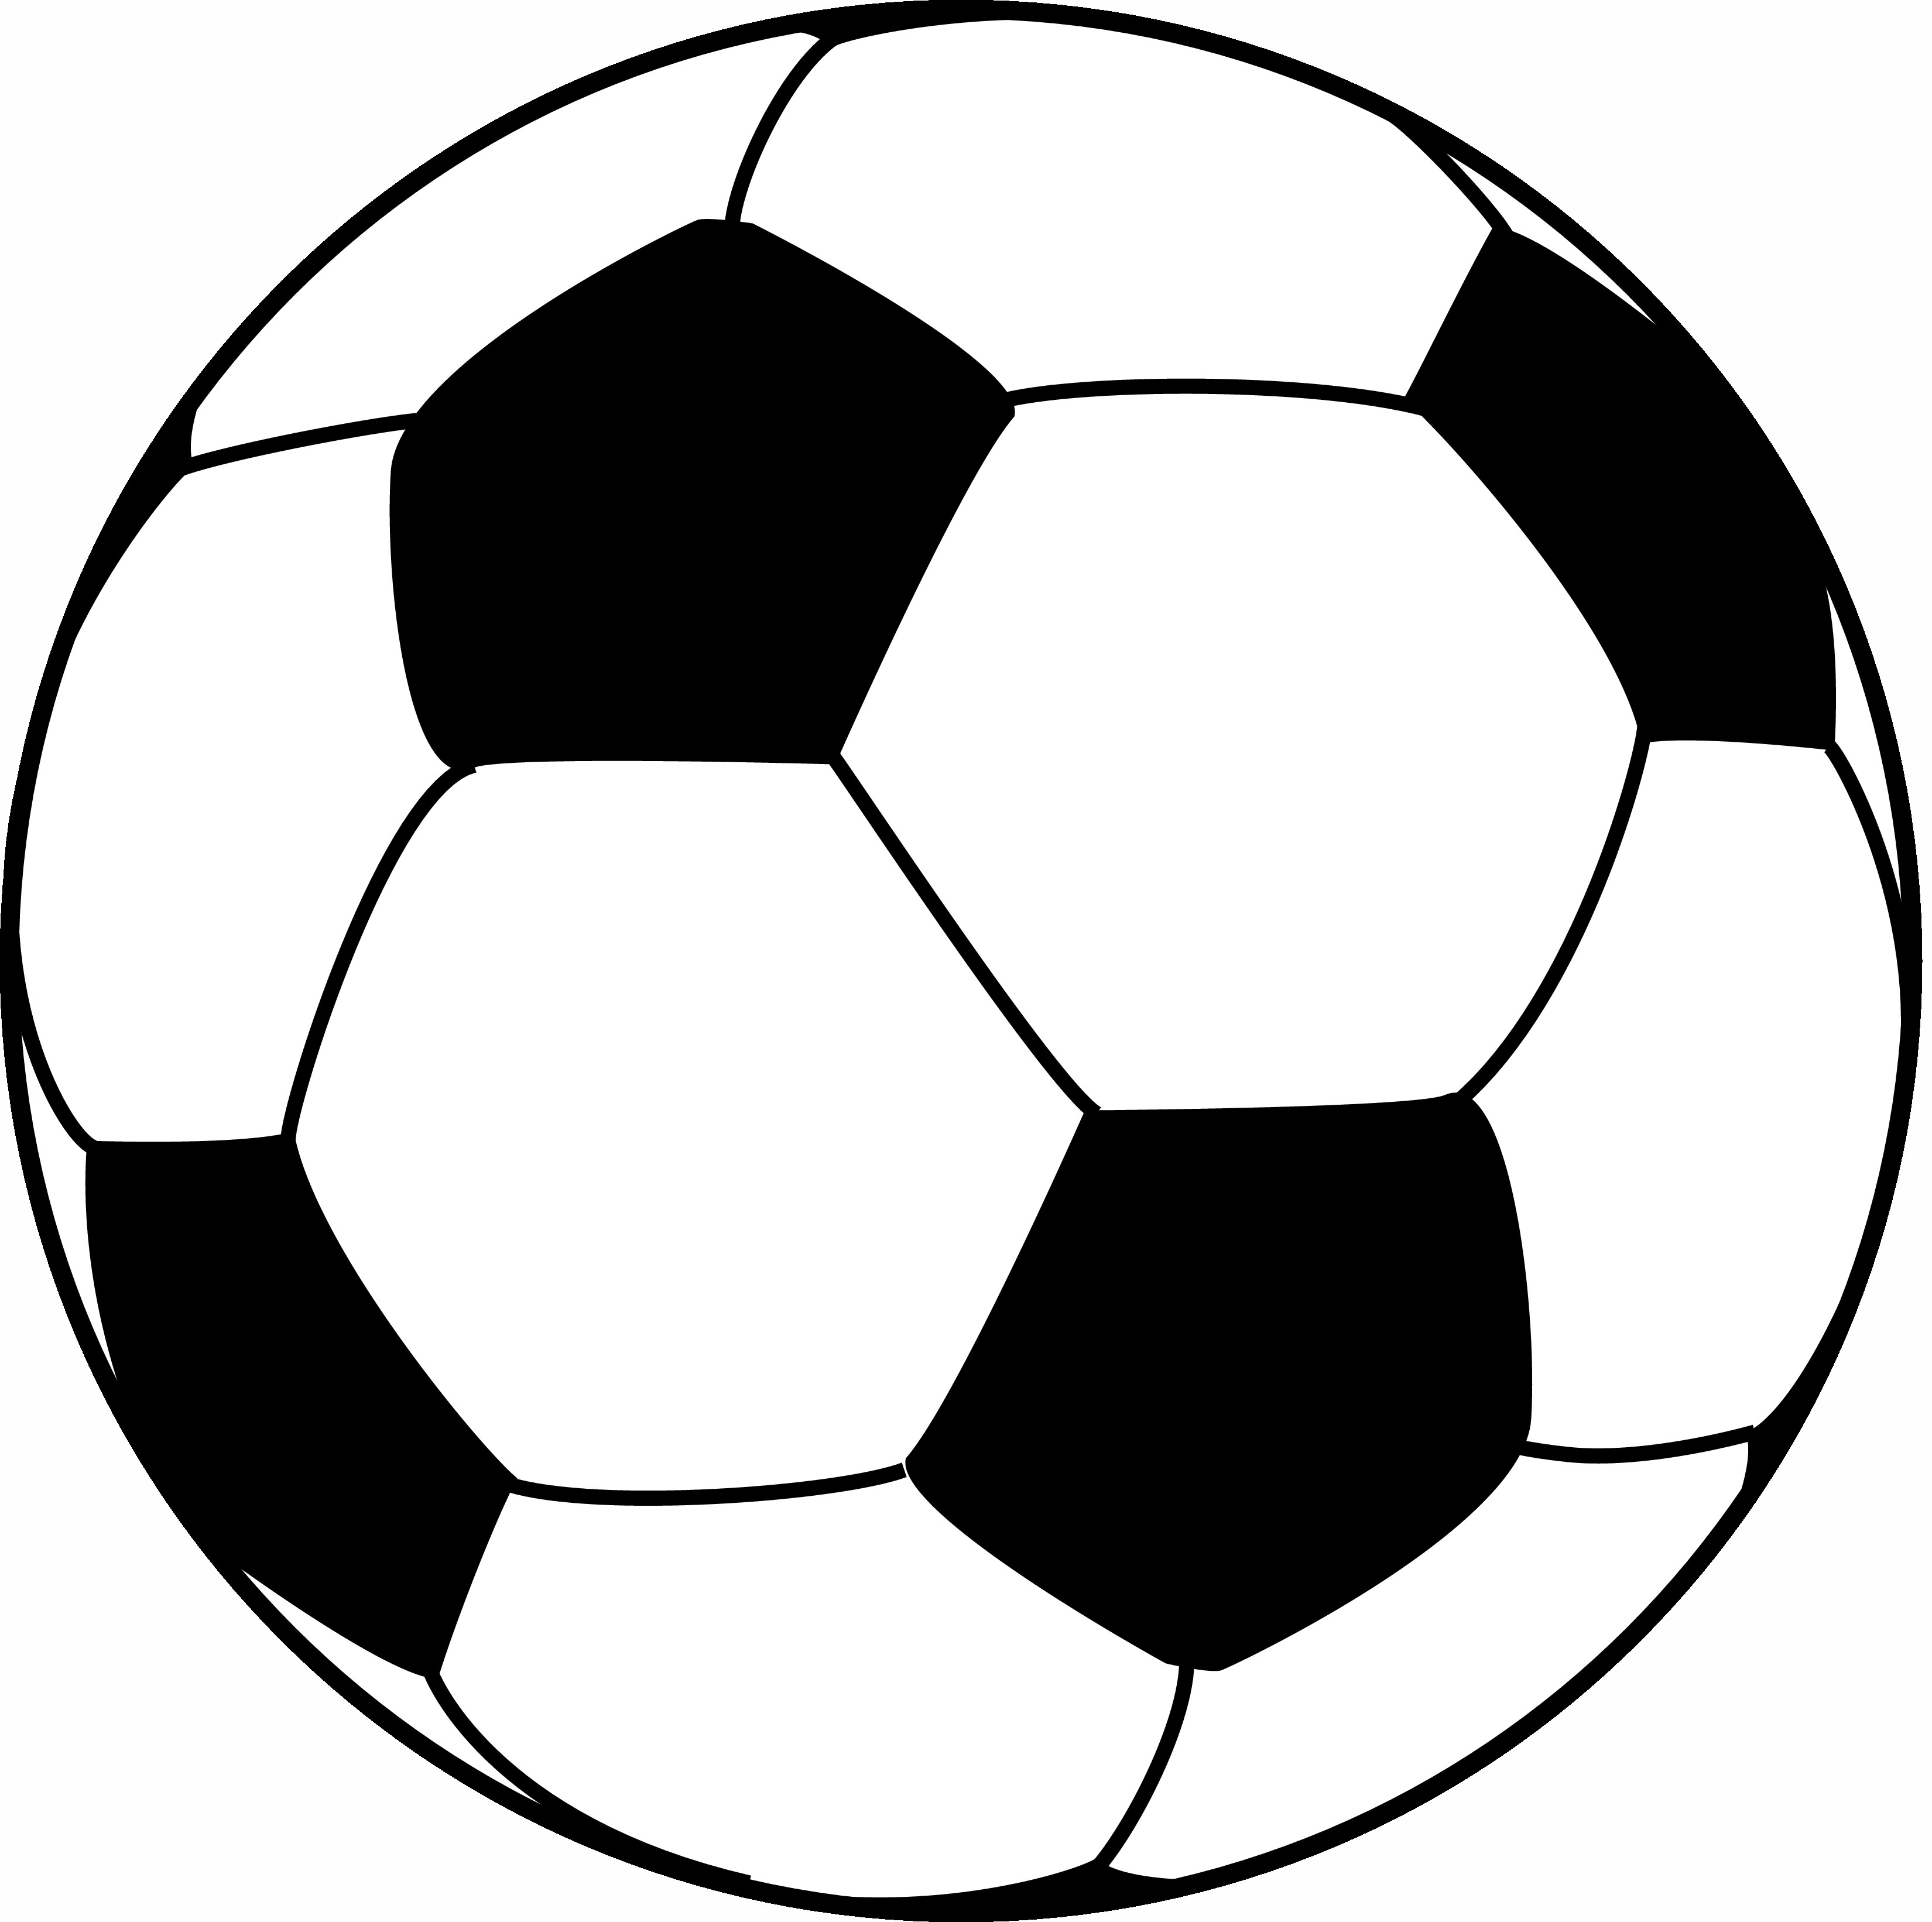
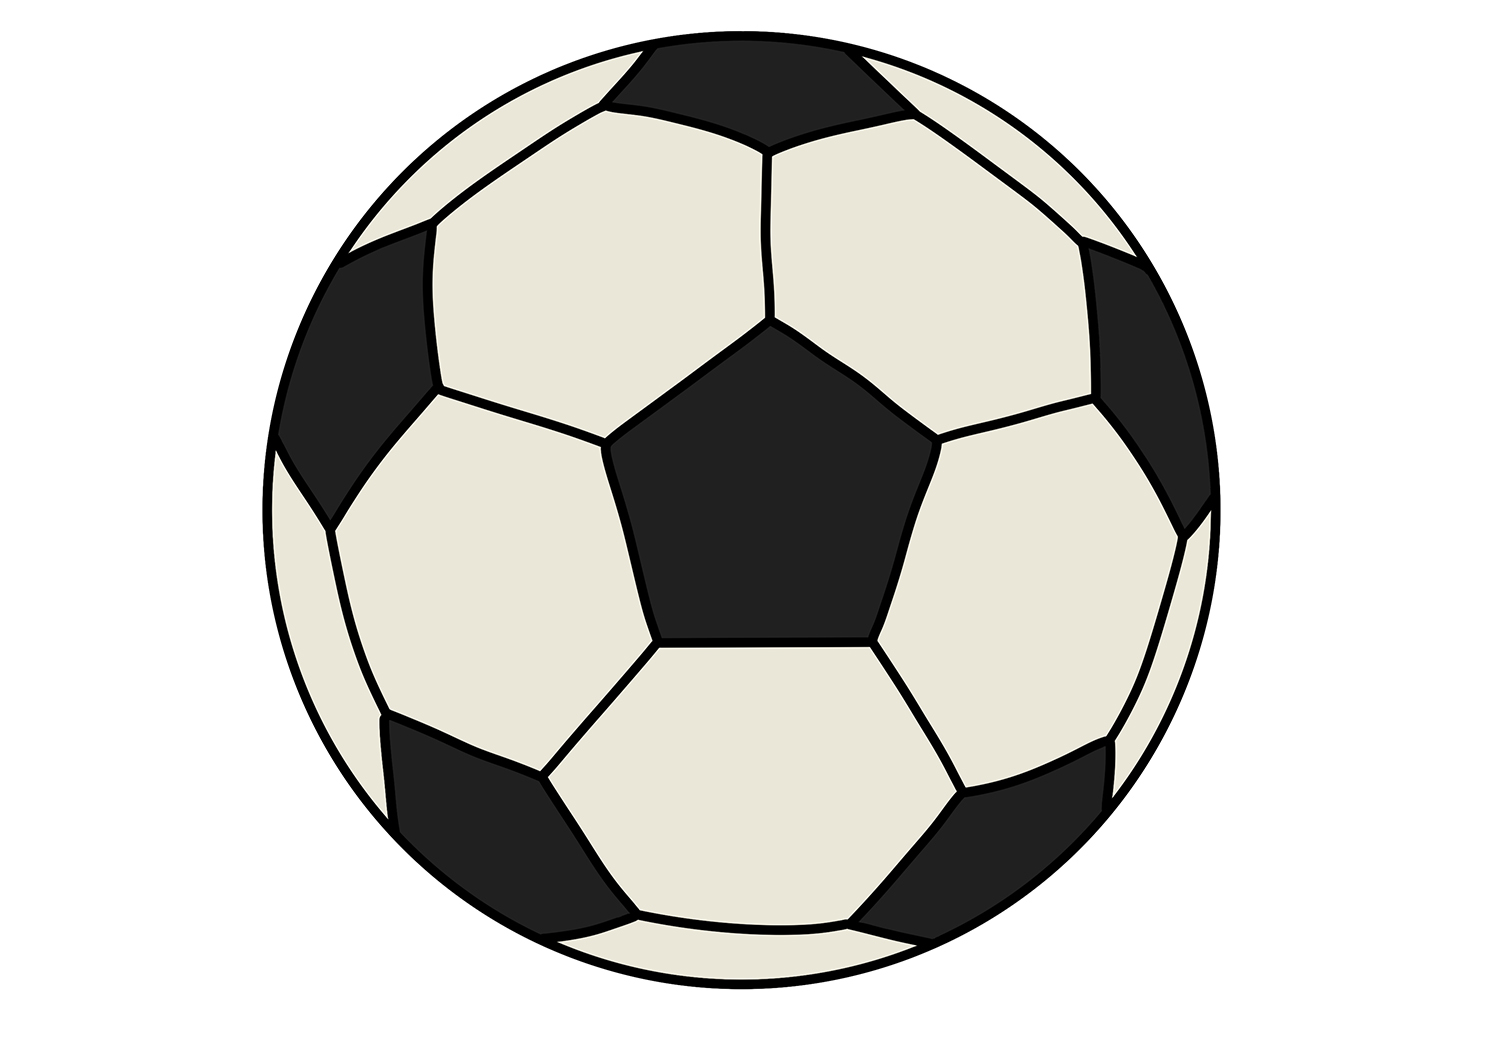
Before you even pick up your pencil, understanding what you're about to draw is crucial. The traditional soccer ball, often referred to as a "Buckyball" or truncated icosahedron, is a marvel of geometric design. It's not just a simple sphere; it's a carefully constructed polyhedral shape. The traditional soccer ball is made from two flat shapes: pentagons and hexagons. Specifically, it consists of 12 black pentagons and 20 white hexagons, all stitched together to form a spherical shape.
This unique arrangement is what gives the soccer ball its distinctive pattern and, surprisingly, its stability and aerodynamic properties. When you're attempting a soccer ball drawing, recognizing this underlying structure is key. Each pentagon is surrounded by five hexagons, and each hexagon is surrounded by three pentagons and three other hexagons. This interlocking pattern is what creates the illusion of a perfectly round object, even though it's constructed from flat panels. Grasping this fundamental geometry will empower you to tackle the pattern with confidence and precision, moving beyond just guessing where lines should go to truly understanding the ball's construction.
Essential Tools for Your Soccer Ball Drawing Journey
You don't need an elaborate art studio to create a fantastic soccer ball drawing. However, having a few basic tools can significantly enhance your experience and the quality of your final artwork. Here’s what we recommend:
- Pencils: A range of graphite pencils is ideal. Start with an HB pencil for initial sketches, as it's easy to erase. For darker lines and shading, a 2B or 4B pencil will provide richer tones. If you're aiming for very light, barely-there guidelines, a 2H pencil can be useful.
- Erasers: A good quality vinyl eraser is essential for clean corrections without smudging. A kneaded eraser is also highly recommended for lifting graphite gently and precisely, which is perfect for creating highlights or softening lines.
- Paper: Any standard drawing paper will do, but a slightly heavier weight (e.g., 60-80 lb or 100-130 gsm) will withstand erasing better and provide a smoother surface for intricate details.
- Ruler and Compass (Optional but Recommended): While the goal is to draw freehand, a compass can help you sketch a perfectly round initial circle, which is the foundation of your ball. A ruler can assist in ensuring your pentagons and hexagons have straight edges, especially when you're starting out. As you gain confidence, you can rely less on these tools.
- Blending Tools (Optional): For smooth shading, you might consider using a blending stump (tortillon), a cotton swab, or even your finger (though be careful with oils from your skin). These help create seamless transitions between different shades of gray.
- Coloring Materials (Optional): If you plan to add color, have your colored pencils, markers, or paints ready. Remember the traditional black and white, but don't hesitate to experiment with other color schemes!
Having these tools at hand will ensure you're well-equipped to follow our tutorial and create realistic soccer ball illustrations effortlessly.
Preparing Your Canvas: Setting the Stage for Success
Before you dive into the actual soccer ball drawing, taking a moment to prepare can make a significant difference in your overall experience and the quality of your artwork. Think of it as setting the stage for a successful performance.
First, find a comfortable and well-lit workspace. Good lighting is crucial for seeing your lines clearly and for accurately judging your shading. A flat, stable surface will prevent wobbles and ensure your lines are steady. Ensure you have enough space to spread out your tools and move freely.
More importantly, prepare your mindset. Drawing, like any skill, requires patience and a willingness to learn from every stroke. You might find that how to draw a soccer ball seems easy until you actually try to draw the pattern, and that’s where it can get tricky. Don't let initial challenges discourage you. Embrace the process, understand that mistakes are part of learning, and approach each step with enthusiasm. As the old saying goes, "Isn't it just recognizing the truth of life and still loving it?" Apply this philosophy to your drawing: acknowledge the difficulties, but maintain your passion for creating. This positive outlook will make the entire process more enjoyable and ultimately lead to better results.
Step-by-Step Guide to Soccer Ball Drawing: The Easiest Way
Now, let's get to the heart of it! This guide will show you just how simple it can be to create a realistic soccer ball. We'll separate your soccer ball drawing into manageable steps, making the complex pattern approachable for all artists. Discover how to draw a soccer ball step by step with our easy guide.
Step 1: The Perfect Circle – Your Foundation
Every great soccer ball drawing begins with a solid foundation: a perfect circle. This will be the outline of your soccer ball, so make it as round and even as possible. A well-drawn circle sets the stage for accurate proportions and a convincing spherical shape.
- Freehand Method: If you're confident, try drawing a light circle with a loose, continuous motion from your shoulder, not just your wrist. Practice a few times on scrap paper.
- Compass Method: For absolute precision, use a compass. This is especially helpful for beginners to ensure the initial shape is flawless.
- Tracing Method: You can also lightly trace around a circular object (like a roll of tape or a cup) if you're struggling to get a good circle freehand. Just make sure your circle isn't too small, allowing room for details.
Draw this circle lightly with an HB pencil. Remember, this is just a guideline, and you'll refine it later. The goal here is to establish the overall size and position of your ball on the paper.
Step 2: Mapping the Hexagons and Pentagons
This is where the unique pattern of the soccer ball comes to life, and it's often where how to draw a soccer ball seems easy until you actually try to draw the pattern. That’s where it can get tricky. But with a systematic approach, it becomes much simpler. The key is to separate your soccer ball drawing into manageable sections.
- Locate the First Pentagon: Imagine the ball is slightly angled. Start by drawing one pentagon (a five-sided shape) in the center of your circle. This pentagon doesn't have to be perfectly symmetrical or perfectly flat on the page; remember, it's on a curved surface. Draw it lightly, keeping in mind its position relative to the center of your circle. This will typically be one of the "black" panels.
- Surround with Hexagons: Each side of the central pentagon will connect to a hexagon (a six-sided shape). Lightly sketch these five hexagons around your central pentagon. Pay attention to how their edges meet the pentagon's edges.
- Expand the Pattern: Now, from the exposed sides of these hexagons, you'll start to see more pentagons and hexagons emerging. A good rule of thumb is:
- Every pentagon is surrounded by hexagons.
- Every hexagon is surrounded by three pentagons and three hexagons.
Continue to lightly sketch these shapes, making sure they curve with the implied spherical surface of the ball. The lines will appear shorter and more compressed as they get closer to the edges of your initial circle, creating the illusion of depth. Don't press too hard; these are still guidelines.
- Consider Perspective: As the shapes move away from the center of the ball, they will appear more distorted due to perspective. Shapes closer to the edge of the circle will be narrower and more elongated than those in the center. This is crucial for creating a realistic soccer ball.
Step 3: Defining the Lines and Shapes
Once you have a satisfactory pattern sketched out, it's time to refine your lines and give your soccer ball drawing more definition. This step is about cleaning up your initial sketches and making your lines crisp.
- Darken Key Lines: Using a slightly darker pencil (like a B or 2B), go over the lines of your pentagons and hexagons that you want to be visible. Make sure they are smooth and continuous.
- Erase Unnecessary Guidelines: Gently erase any overlapping or construction lines that are no longer needed. Be careful not to erase the lines you want to keep. A kneaded eraser is excellent for this, as it lifts graphite without smudging.
- Refine the Outer Circle: Darken the main outline of the ball, making it a strong, clear circle. Ensure it encapsulates all your internal patterns neatly.
- Check for Symmetry and Proportion: Step back and look at your drawing. Do the shapes look consistent? Is the overall ball shape still round? Make any necessary adjustments. This is your chance to correct any minor distortions before moving to shading.
Step 4: Adding Depth and Realism Through Shading
Shading is what transforms your flat drawing into a three-dimensional object. This is where you truly create realistic soccer ball illustrations effortlessly.
- Identify Your Light Source: Before you start shading, decide where your light source is coming from. This will determine where the highlights and shadows fall on your ball. For example, if the light is from the top-left, the top-left of the ball will be brightest, and the bottom-right will be darkest.
- Apply Base Tones:
- Black Panels: Traditionally, the pentagons are black. Using a darker pencil (like 4B or 6B), lightly fill in the pentagons. Build up the darkness gradually. Remember that even black panels will have subtle variations in tone depending on the light.
- White Panels: The hexagons are typically white, but they won't be pure white. They will have subtle shadows and mid-tones, especially as they curve away from the light source. Use a lighter pencil (HB or B) to add very light shading to the hexagons, making them slightly darker as they recede into shadow.
- Create Gradual Shading: Apply darker shades to the areas furthest from your light source and lighter shades closer to it. Use a smooth, consistent stroke. For the overall spherical shape of the ball, apply a soft gradient of shade across its surface, making it darker towards the edges and lighter towards the center (or where the light hits directly).
- Blend for Smoothness: Use a blending stump, cotton swab, or even a soft tissue to smooth out your graphite. This will eliminate harsh pencil lines and create seamless transitions between tones, giving your ball a soft, rounded appearance.
- Add Highlights: Use your kneaded eraser to gently lift graphite from the brightest areas of the ball, where the light hits most directly. This creates sharp highlights that make the ball appear shiny and three-dimensional.
- Cast Shadow: Don't forget the cast shadow beneath the ball. This grounds your drawing and further enhances the illusion of depth. The shadow should be darkest directly under the ball and gradually lighten and diffuse as it moves away.
By following these steps, you'll see your soccer ball drawing come to life with impressive realism.
Common Pitfalls and How to Avoid Them in Soccer Ball Drawing
Even with the best instructions, artists often encounter similar challenges when attempting a soccer ball drawing. Recognizing these common pitfalls can help you avoid them and improve your results significantly.
- Distorted Shapes: The most frequent mistake is drawing pentagons and hexagons that are too flat or irregularly shaped, especially as they curve around the ball.
- Solution: Always remember that these shapes exist on a sphere. They will appear foreshortened towards the edges. Practice drawing curved lines and understanding perspective. Use light guidelines initially to ensure consistency.
- Flat Appearance (Lack of Shading): A common issue is a ball that looks like a flat circle with a pattern, rather than a three-dimensional sphere.
- Solution: Master shading. A consistent light source, gradual tonal changes across the entire ball (not just the panels), and a strong cast shadow are crucial for creating depth. Don't forget subtle shading even on the "white" panels.
- Incorrect Pattern Placement: Getting the pentagon-hexagon relationship wrong can make the ball look "off."
- Solution: Remember the rule: every pentagon is surrounded by five hexagons, and every hexagon is surrounded by three pentagons and three hexagons. Start with a central pentagon and build outwards methodically. Visualize the 3D structure.
- Rushing the Process: Impatience can lead to sloppy lines, inconsistent patterns, and rushed shading.
- Solution: Take your time. Drawing a realistic soccer ball requires precision and patience, especially with the pattern. Work in light layers, building up detail and tone gradually. It's better to spend more time and get it right than to rush and be disappointed.
- Ignoring the Outer Circle: Sometimes artists focus so much on the internal pattern that the overall spherical shape becomes lopsided.
- Solution: Continuously check your initial circle outline. Ensure it remains perfectly round throughout the drawing process, especially when darkening the final lines.
By being aware of these common challenges, you can approach your soccer ball drawing with a more strategic mindset, leading to more satisfying and realistic outcomes.
Beyond the Basics: Advanced Tips for Lifelike Soccer Ball Drawings
Once you've mastered the fundamental steps of soccer ball drawing, you might want to push your skills further and add even more realism to your illustrations. Here are some advanced tips to elevate your artwork:
- Texture: A soccer ball isn't perfectly smooth. Modern balls often have a subtle pebbled or dimpled texture. To represent this, you can use very light, tiny dots or irregular scribbles over your shaded areas. Avoid making them too prominent; they should be subtle enough to suggest texture without distracting from the overall form.
- Reflections and Highlights: Beyond simple highlights, consider the environment the ball is in. If it's on a grassy field, there might be a faint green tint reflected on its lower surface. If there's a strong light source, the highlight might be a sharp, almost white spot. Adding a subtle "specular highlight" can make the ball appear more glossy or synthetic.
- Motion Blur (for dynamic drawings): If you're drawing a ball in action (e.g., being kicked or flying through the air), you can add motion blur. This involves slightly blurring the edges of the ball in the direction of movement, and perhaps adding subtle streak lines behind it. This technique adds dynamism and speed to your soccer ball drawing.
- Environmental Context: A ball floating in white space can be impactful, but placing it in an environment adds depth. Consider drawing it on grass, dirt, or a court. The way light interacts with the ball and its surroundings (e.g., shadows cast by grass blades) will significantly enhance realism.
- Material Variation: Not all soccer balls are made of the same material. Some are leather, others synthetic. Leather might have subtle creases or a duller sheen, while synthetic materials might be smoother and reflect light more sharply. Observing real soccer balls will help you capture these nuances.
Experimenting with these advanced techniques will allow you to create truly captivating and lifelike soccer ball illustrations that stand out.
The Curious Case of the Word "Soccer": A Brief History
While you're meticulously crafting your soccer ball drawing, have you ever paused to consider the origin of the word "soccer" itself? It's a fascinating linguistic journey that often surprises people, as many assume it's an American invention. However, that's not quite right.
The term "soccer" actually originated in Britain. It's a shortening of "Association Football." The word "Association" comes from The Football Association, the first organized governing body for the sport, established in England in 1863. The full name, "Association Football," was a bit of a mouthful. So, students at Oxford University in the late 19th century coined informal abbreviations for various sports. "Rugby Football" became "rugger," and "Association Football" became "assoccer," which was then further shortened to "soccer."
Yes, the word "soccer" was indeed invented by the British! It then traveled across the Atlantic to the United States in the 20th century. In America, where "football" already referred to American gridiron football, "soccer" became the common term to distinguish it from their native sport. So, while it's widely used in the U.S. and other countries, its roots are firmly planted in Victorian England. Understanding this little piece of history adds another layer of appreciation to the global sport you're depicting in your soccer ball drawing.
Elevate Your Art: Practice and Persistence in Soccer Ball Drawing
Mastering soccer ball drawing, or any artistic skill, is not a one-time event but a continuous journey of practice and persistence. While this guide provides you with the easiest way to draw a soccer ball, true mastery comes from consistent effort and a willingness to learn from every attempt.
Don't be discouraged if your first few drawings aren't perfect. Remember the philosophical insight: "Isn't it just recognizing the truth of life and still loving it?" This applies profoundly to art. You will encounter challenges—the pattern might seem tricky, or your shading might not be as smooth as you'd like. Recognize these "truths" of the learning process, embrace them as opportunities for growth, and continue to approach your art with passion and enthusiasm.
Here are some tips for continuous improvement:
- Draw Regularly: Even short, daily drawing sessions can be more effective than infrequent, long ones. Consistency builds muscle memory and sharpens your observational skills.
- Use References: Look at real soccer balls from different angles and under various lighting conditions. This will help you understand how light behaves on the surface and how the pattern distorts in perspective.
- Experiment: Try different pencils, paper types
Easy How to Draw a Soccer Ball Tutorial and Soccer Ball Tutorial
Easy Soccer Ball Drawing at PaintingValley.com | Explore collection of
How to Draw a Soccer Ball | Design School
