Master The Art Of Carving On Pumpkin: A Comprehensive Guide
The Enduring Appeal of Carving on Pumpkin
The tradition of carving on pumpkin, particularly into jack-o'-lanterns, traces its roots back centuries to Irish folklore. Originally, turnips and potatoes were used to ward off evil spirits, a practice brought to America by immigrants. Upon discovering the native pumpkin, a larger and softer canvas, the tradition evolved into the beloved autumnal activity we know today. This unique art form has been popular for centuries and continues to be a cornerstone of fall celebrations, from harvest festivals to Halloween. Beyond its historical significance, the appeal of carving on pumpkin lies in its accessibility and the immediate gratification it offers. Unlike more permanent forms of carving, such as wood or stone, pumpkin carving is a temporary art, allowing for annual experimentation and creativity without a long-term commitment. It's a communal activity, often bringing families and friends together, fostering shared memories and friendly competition. The vibrant orange canvas, combined with the warm glow of a candle or LED light, creates an inviting and festive atmosphere, making carved pumpkins iconic symbols of the season.Understanding the Fundamentals of Carving
At its heart, carving is a subtractive art form. It's the process of shaping and sculpting a material by cutting away unwanted parts to create a desired form or design. This fundamental definition holds true whether you're working with wood, stone, or, in our case, a pumpkin. The goal is always to reveal the hidden beauty or character within the material. For pumpkin carving, this means carefully removing portions of the pumpkin's flesh to create outlines, shadows, or three-dimensional forms. The technique can be applied to any material that is solid enough to hold a form, and a pumpkin, despite its softness compared to wood or stone, possesses sufficient structural integrity for various carving methods. While wood carving offers distinct styles like whittling, relief carving, carving in the round, and chip carving, the principles of these methods can be conceptually adapted to pumpkin carving. For instance, creating a design by only scraping the surface without cutting all the way through is akin to relief carving, while sculpting a pumpkin into a bust or a fully formed character embodies the spirit of carving in the round. Understanding these basic principles empowers you to approach your pumpkin with a clear artistic vision, transforming it from a simple gourd into a personalized work of art.Essential Tools for Your Pumpkin Carving Journey
Just as a woodcarver relies on best wood carving knives and specialized tools, successful pumpkin carving also depends on having the right equipment. While you might be tempted to reach for kitchen knives, dedicated pumpkin carving tools offer greater precision, safety, and a wider range of possibilities for intricate designs. Everything for the carving enthusiast, from tips and techniques and tool reviews to patterns and instructions for amazing projects, begins with the right tools. Safety should always be your top priority. Always use sharp tools, as dull blades require more force and are more prone to slipping. Work on a stable surface, and always cut away from yourself. For younger carvers, consider child-safe kits or focus on supervised etching techniques.Beginner-Friendly Pumpkin Carving Tools
For those new to carving on pumpkin, a basic kit will suffice. These typically include: * **Serrated Saw:** Often found in store-bought kits, these are ideal for cutting the lid and larger sections of the pumpkin. Their serrated edge helps them grip the pumpkin flesh. * **Scoop/Scraper:** Essential for hollowing out the pumpkin and removing seeds and stringy pulp. A sturdy metal scoop with a comfortable handle is preferable. * **Small Detail Saw:** For cutting out smaller features like eyes, noses, and mouths. These are thinner and more precise than the larger serrated saw. * **Poking Tool/Awl:** Used to transfer patterns by poking holes along the design lines. * **Dry Erase Marker or Pen:** For drawing your design directly onto the pumpkin. These tools provide a solid foundation for simple yet effective jack-o'-lanterns and are perfect for beginners looking for simple projects to start with.Advanced Carving Kits for Intricate Designs
As your skills in carving on pumpkin grow, you might want to invest in more specialized tools that allow for greater detail and complex techniques. These can include: * **Clay Sculpting Tools:** Excellent for scraping away thin layers of pumpkin skin for etching and creating subtle contours. * **Linoleum Cutters/Gouges:** These small, U-shaped or V-shaped tools are perfect for creating fine lines and textures, similar to how they're used in printmaking. * **X-Acto Knives/Craft Knives:** With extremely sharp, fine blades, these are ideal for delicate cuts and intricate details, particularly for surface etching. * **Dremel Tool with Carving Bits:** For serious carvers, a rotary tool can be a game-changer, allowing for rapid removal of material, intricate textures, and smooth finishes. Always use safety goggles when operating power tools. * **Specialized Pumpkin Carving Tools:** Some companies offer professional-grade tools specifically designed for pumpkin carving, featuring ergonomic handles and durable blades for extended use. With these advanced tools, you can explore a variety of carving methods and push the boundaries of your creativity, turning your pumpkin into a true work of art.Preparing Your Pumpkin for Carving Success
Proper preparation is key to a successful and long-lasting carved pumpkin. It’s not just about cutting; it’s about setting the stage for your artistic vision. 1. **Choosing the Right Pumpkin:** Select a pumpkin that is firm, free of soft spots, bruises, or deep cuts. A flat bottom is ideal for stability. Consider the shape and size relative to your desired design. A larger pumpkin offers more surface area for intricate work, while smaller ones are great for charming figurines or simple, quick projects. 2. **Cleaning and Hollowing Techniques:** * **Cut the Lid:** Traditionally, the lid is cut from the top. However, for better preservation and stability, many experienced carvers recommend cutting a hole from the bottom of the pumpkin. This allows moisture to drain and prevents the top from caving in. Cut at an angle, so the lid rests securely without falling inside. * **Scoop Out the Guts:** Use a sturdy scoop or ice cream scooper to remove all seeds and stringy pulp. Scrape the inside walls until they are smooth and about 1 to 1.5 inches thick. A thinner wall makes carving easier but can compromise the pumpkin's structural integrity if too thin. 3. **Transferring Designs:** * **Freehand:** For simple designs or experienced carvers, drawing directly onto the pumpkin with a dry-erase marker is effective. * **Stencil/Pattern:** Print your chosen pattern and tape it securely to the pumpkin. Use a poking tool or awl to poke holes along the lines of the design, creating a dotted outline on the pumpkin's surface. Remove the paper and connect the dots with a marker. * **Carbon Paper:** For more complex designs, carbon paper can be placed between the pattern and the pumpkin, allowing you to trace the design directly. By taking the time to properly prepare your pumpkin, you create a clean, stable, and ready canvas for your carving masterpiece.Exploring Diverse Carving on Pumpkin Styles and Techniques
Just as there are a variety of carving methods in wood, pumpkin carving also offers a range of styles that allow for different levels of complexity and artistic expression. Although there are many forms, all fit the basic definition of shaping material by removing parts. Discover 30 super easy carving ideas perfect for beginners, from delightful traditional faces to charming sculptural pieces.Mastering the Art of Pumpkin Etching
Pumpkin etching, often referred to as surface carving or relief carving, involves removing only the outer layer of the pumpkin skin to reveal the lighter flesh underneath, without cutting all the way through. This technique creates a beautiful two-tone effect and allows for incredible detail and shading, similar to how relief carving works in wood. * **Technique:** Use small gouges, linoleum cutters, or X-Acto knives to carefully scrape away the orange skin. Varying the depth of your cuts can create different shades and textures, adding depth and dimension to your design. For example, a shallow scrape will appear lighter, while a deeper scrape will be brighter. * **Best for:** Portraits, intricate scenes, logos, and designs that benefit from subtle shading rather than stark cut-outs. It's less prone to spoilage than full cut-throughs, as the pumpkin's interior remains largely intact.Bringing Pumpkins to Life with 3D Carving
3D carving, or carving in the round, transforms the pumpkin into a true sculpture, where the design extends beyond a flat surface. This method involves cutting away significant portions of the pumpkin to create three-dimensional forms, often utilizing the pumpkin's natural curves. * **Technique:** This style requires a deeper understanding of form and negative space. You'll use larger carving tools, possibly even a Dremel, to sculpt features that protrude or recede. Think of sculpting a nose, cheekbones, or hair on a pumpkin face. The goal is to create a multi-faceted design that looks impressive from all angles. * **Best for:** Creating realistic faces, animal busts, or fantastical creatures where the pumpkin itself becomes the character. This is a more advanced technique but yields truly stunning and unique results. Other popular styles include: * **Traditional Cut-Through:** The most common method, where parts of the design are completely cut out, allowing light to shine through. Perfect for classic jack-o'-lantern faces and simple patterns. * **Stenciled Designs:** Utilizing pre-made stencils for consistent and clean cut-outs, great for beginners or those wanting a specific look. * **Hybrid Carving:** Combining cut-through elements with etched details for a dynamic and multi-layered effect. Choosing the style you prefer and learning about it in greater detail will significantly enhance your carving on pumpkin experience.Step-by-Step Guide: Carving on Pumpkin for Beginners
New to pumpkin carving and looking for simple projects to start with? This step-by-step guide will walk you through the process, ensuring a fun and successful first experience with carving on pumpkin. 1. **Gather Your Supplies:** Ensure you have a clean pumpkin, a basic carving kit (serrated saw, scoop, detail saw, poking tool), a dry-erase marker, a bowl for seeds, and a stable work surface. 2. **Prepare Your Workspace:** Lay down old newspapers or a plastic sheet to catch the mess. Have good lighting. 3. **Cut the Opening:** Decide whether to cut from the top or bottom. For beginners, cutting from the top is traditional. Using your serrated saw, cut a circular or hexagonal opening around the stem. Angle your cuts inward so the lid won't fall into the pumpkin. 4. **Clean Out the Interior:** Use your scoop to thoroughly remove all seeds and stringy pulp. Scrape the inside walls until they are relatively smooth and about 1 to 1.5 inches thick. This makes carving easier and helps prevent early spoilage. 5. **Choose and Transfer Your Design:** For your first pumpkin, select a simple design with bold lines. You can draw a simple face directly with a dry-erase marker or use a printed stencil. If using a stencil, tape it to the pumpkin and use the poking tool to create a dotted outline of your design. 6. **Begin Carving:** * Start with the smallest, most intricate parts of your design first. This reduces the risk of the pumpkin collapsing as you remove more material. * Use your small detail saw for eyes, nose, and mouth. Hold the saw like a pencil and apply steady, gentle pressure. * Always cut away from yourself to prevent accidents. * For larger sections, the serrated saw can be used carefully. * If a piece gets stuck, gently push it out from the inside. Avoid forcing it, as this can crack the pumpkin. 7. **Clean Up Your Carving:** Once all the pieces are cut out, use a damp cloth to wipe away any marker lines or pumpkin residue from the exterior. 8. **Light Your Masterpiece:** Place an LED candle or a traditional candle (with caution and supervision) inside your carved pumpkin. LED candles are safer and last longer. Troubleshooting common issues: * **Pumpkin too tough:** Ensure your tools are sharp. If using a dull tool, it will require excessive force, increasing the risk of slips. * **Cracks appearing:** Avoid cutting too close to the edge or making walls too thin. If a small crack appears, you can try to secure it with a toothpick. Remember, practice makes perfect. Your first carving might not be flawless, but it will be uniquely yours.Advanced Techniques and Creative Pumpkin Carving Ideas
For the seasoned carver or those who have mastered the basics, the world of carving on pumpkin offers endless possibilities for amazing projects that both beginners and advanced carvers can appreciate. Wood carving is a unique art form using various techniques to create stunning sculptures and decorations, and the same artistic drive applies to pumpkins. * **Multi-Layered Etching:** Go beyond simple surface scraping. By varying the depth of your etching, you can create multiple layers of light and shadow, giving your design incredible depth. For example, remove the skin for the lightest areas, then scrape a little deeper for mid-tones, and finally cut through for the darkest, most illuminated sections. This technique mimics the intricate details found in fine relief carving. * **Sculptural Additions:** Don't limit yourself to the pumpkin's surface. Use removed pieces of pumpkin or even other vegetables to create three-dimensional additions like ears, noses, or hair, attaching them with toothpicks. This brings your pumpkin to life, much like carving in the round. * **Integrating Props and Embellishments:** Think beyond just the pumpkin. Incorporate external elements like hats, glasses, wigs, fabric, or even small battery-operated lights to enhance your design. For instance, a carved witch face can be given a more authentic look with a miniature witch's hat and some fabric for a cloak. * **Complex Stencils and Freehand Mastery:** Utilize highly detailed stencils for intricate scenes, famous characters, or architectural designs. For the truly advanced, freehand carving allows for spontaneous creativity and unique, one-of-a-kind masterpieces. This requires confidence and a keen eye for proportion and balance. * **Power Tool Precision:** As mentioned, a Dremel or similar rotary tool with various carving bits can revolutionize your carving. It allows for smooth edges, intricate textures, and rapid material removal, making complex designs more achievable. Always wear safety glasses and follow tool instructions. * **Themed Displays:** Create a narrative with multiple pumpkins. Carve a family of characters, a spooky graveyard scene, or a whimsical forest, arranging them together for a cohesive and impactful display. This extends the art beyond a single pumpkin to an entire tableau. From delightful wooden spoons to charming figurines, unleash your creativity with these fun and simple projects, but also challenge yourself with more complex designs. The key is to experiment, be patient, and enjoy the process of bringing your artistic vision to life through carving on pumpkin.Maintaining Your Masterpiece: Post-Carving Care
After putting in all that effort into carving on pumpkin, you'll want your masterpiece to last as long as possible. Pumpkins are organic materials, and they naturally begin to decompose once cut. However, there are several steps you can take to slow down this process and keep your carved pumpkin looking fresh for longer. 1. **Clean Thoroughly:** After carving, wipe down the entire pumpkin, inside and out, to remove any residual pulp or moisture. This helps prevent mold growth. 2. **Moisture Retention:** * **Petroleum Jelly:** Apply a thin layer of petroleum jelly (Vaseline) to all cut edges. This creates a barrier that locks in moisture and prevents the pumpkin from drying out and shriveling. * **Vegetable Oil Spray:** Some carvers prefer to lightly spray the entire pumpkin, inside and out, with a vegetable oil cooking spray for a similar effect. * **Water Bath:** If your pumpkin starts to shrivel, you can submerge it in a bath of cold water for a few hours (or overnight) to rehydrate it. This is a temporary fix but can revive a wilting pumpkin. 3. **Prevent Mold:** * **Bleach Solution:** A common trick is to spray the inside and cut edges with a solution of 1 teaspoon of bleach per gallon of water. This helps kill bacteria and mold spores. Let it air dry completely. * **Pumpkin Preservative Sprays:** Commercial pumpkin preservative sprays are also available, offering a convenient way to extend your carving's life. 4. **Strategic Placement:** * **Avoid Direct Sunlight:** Keep your carved pumpkin out of direct sunlight, which can accelerate drying and decomposition. * **Cool, Shaded Area:** A cool, shaded porch or entryway is ideal. If temperatures are warm during the day, bring your pumpkin indoors overnight or during the hottest parts of the day. * **Ventilation:** Ensure good air circulation around the pumpkin to prevent moisture buildup, which encourages mold. 5. **Lighting Choice:** Use LED candles instead of traditional flame candles. Flame candles generate heat, which cooks the pumpkin from the inside, causing it to rot faster. LED lights are safer, last longer, and produce no heat. By following these preservation tips, you can significantly extend the life of your carved pumpkin, allowing you and your admirers to enjoy your artistic creation for days, or even weeks, longer.Conclusion
The art of carving on pumpkin is a timeless tradition that offers a wonderful avenue for creative expression, regardless of your skill level. From the fundamental act of shaping a material by removing portions to exploring diverse styles like etching and 3D sculpting, the journey of transforming a simple gourd into a glowing masterpiece is immensely rewarding. We've explored everything for the carving enthusiast, from essential tools and preparation tips to advanced techniques and crucial post-carving care. Whether you're crafting a classic jack-o'-lantern for Halloween or an intricate autumnal display, remember that carving is the process of shaping and sculpting a material to create a desired form or design, and pumpkins offer a unique, temporary canvas for this traditional art. So, gather your tools, choose your pumpkin, and unleash your creativity. We encourage you to share your carving on pumpkin creations in the comments below or share this guide with friends and family looking to embark on their own carving adventures. Happy carving!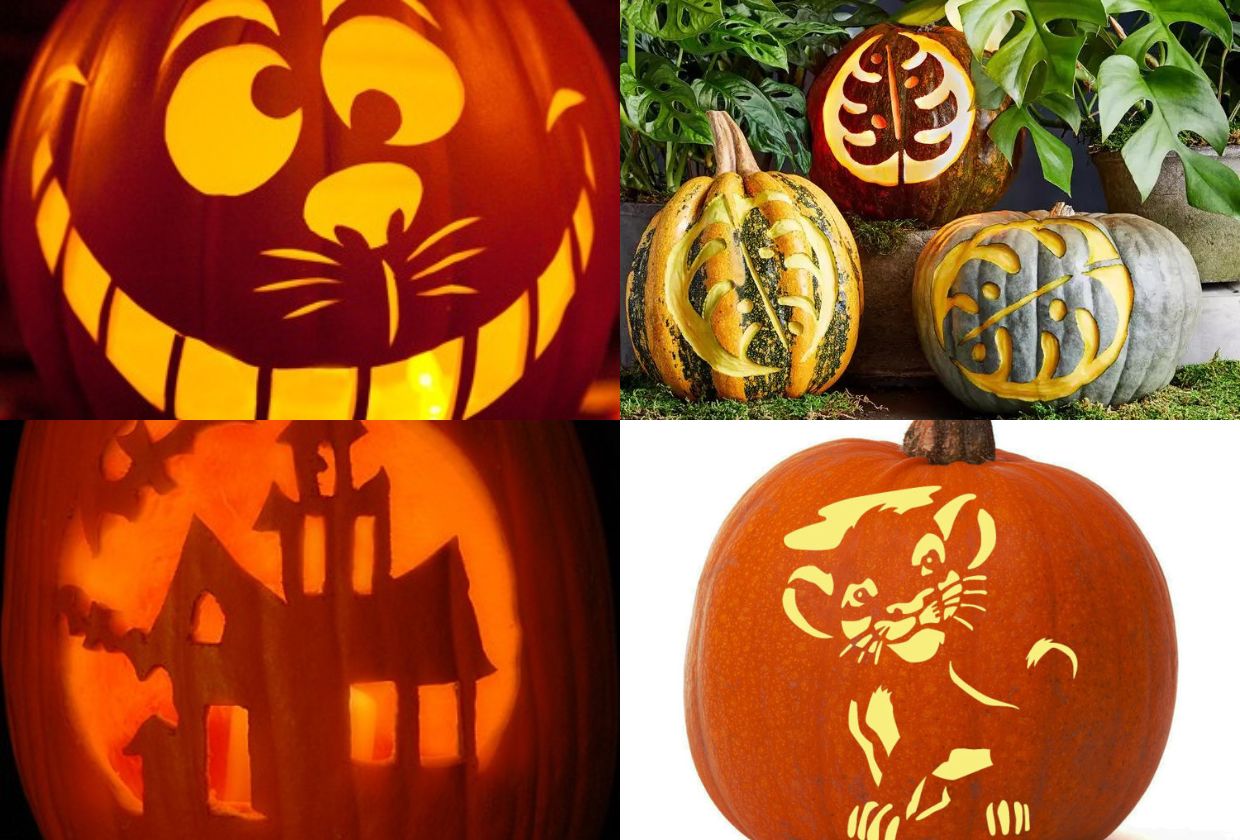
30 of the best pumpkin carving stencils for Halloween 2024 - Gathered

Turkey Pumpkin Carving Design

Pumpkin Carving Templates
